General conversation among those who regularly attended James' occasionally turned to the possibility of the Club building a second, smaller, gauge 0 layout that could be transported relatively easily and exhibited at smaller exhibitions such as 'Risex'. A dockside scene was one idea mooted, but the concept took on a practical form when it was suggested that a 'shunting puzzle' would be a good choice. This would be very small, cheap to build and give visiting public the opportunity to 'have a go', perhaps in a competition format. It could also be a challenge to Club members to see who could complete the puzzle in the shortest time/number of moves.
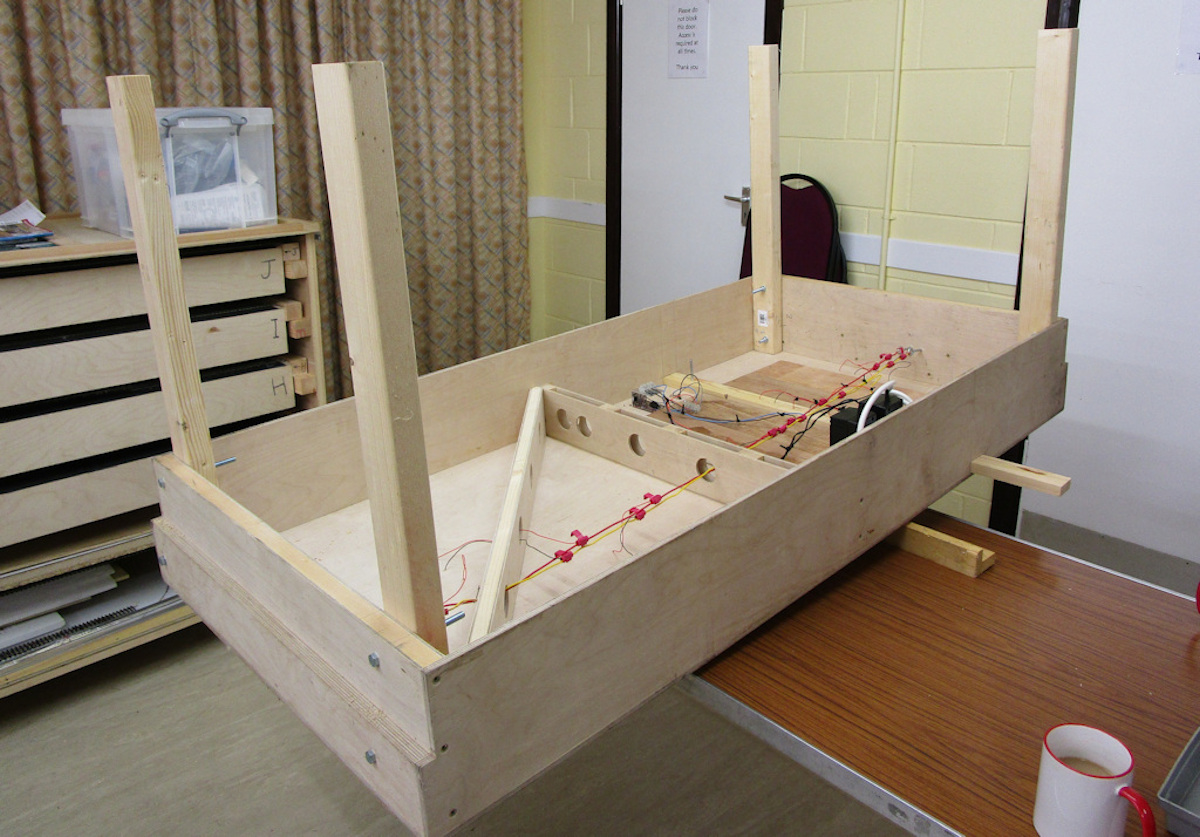
It was evident that whatever was built would have to be achieved at absolute minimal cost. As the Club was already in possession of two baseboards that were unused prototypes for the Aylesbury Town layout, each 1.5m x 0.75m, it was thought that one of these could be used and was of a size that would sit on top of one of the folding tables, thus avoiding the addition of legs.
There is also in the Club's store room a quantity of Peco track and pointwork that could be used. Thus far, the total outlay to construct the layout would be - nil. Should it be felt necessary to add scenic building detail, this could be achieved from the use of foam board/artist's mount board and self-printed brick papers. Not a lot of cost involved there. There are sufficient controllers in the Club's ownership, both analogue and digital, to supply power, with the analogue option probably the best bet if the public are going to get involved.
Rolling stock can be seconded from Okehampton and a couple of offers of loans of locomotives can be relied upon. Another benefit from such a layout would be the trial of automatic couplings for the Okehampton project.
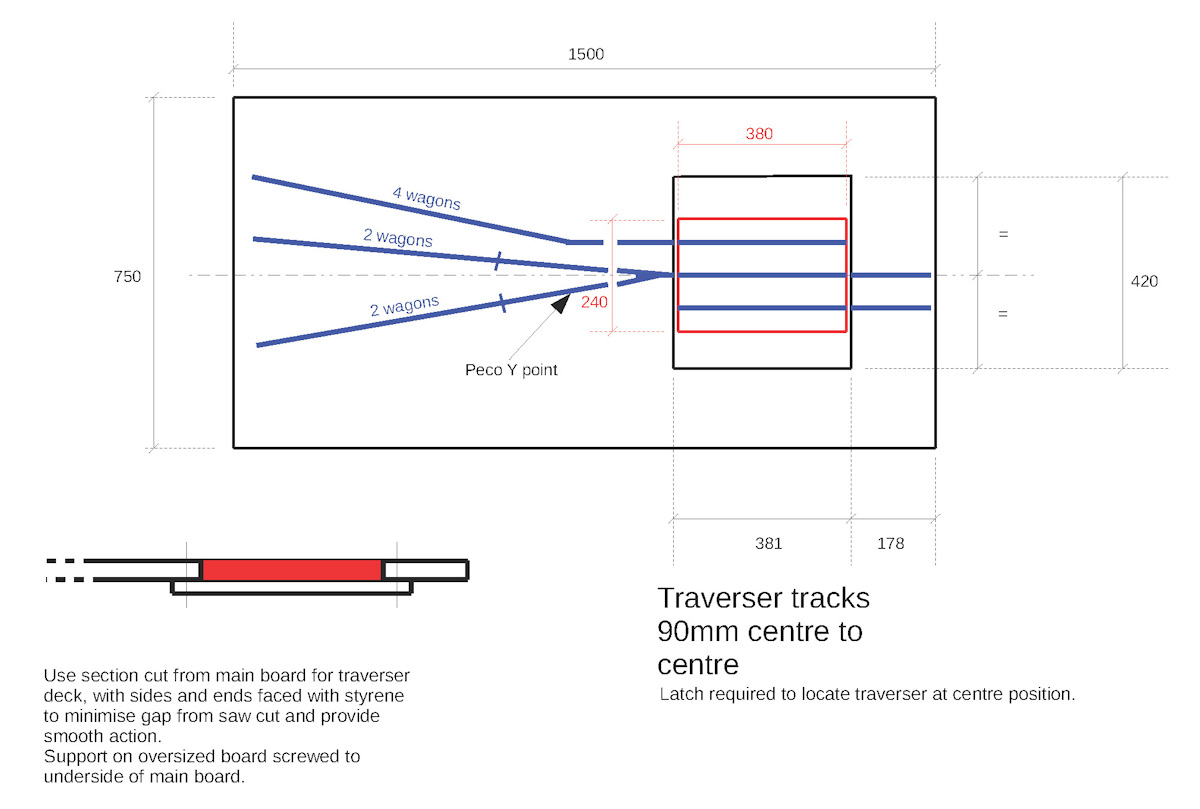
Initially, a 'Timesaver' design was suggested, but this proved to be a little too large to fit on our baseboard. Further searches suggested that the classic 'Inglenook' would be the best option if the length could be accommodated. The answer came from a design by Jim Read called 'Moxley'.
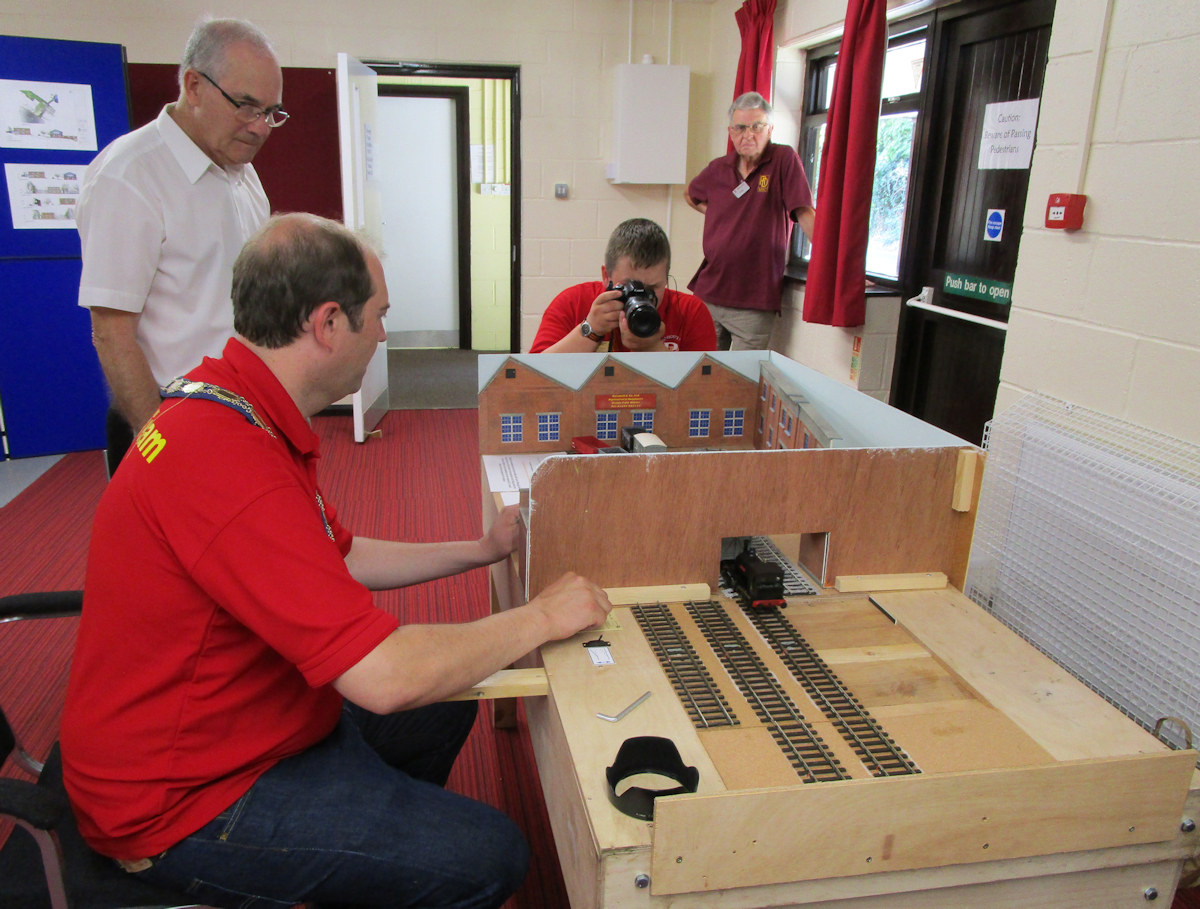
At the FestiRail Model Railway Exhibition, John C instructs the Mayor of Princes Risborough Matthew Walsh whilst John H looks on.
John C has spent the last couple of weeks building the other warehouse, he we can see it in place, along with the various wagons in position for FestiRail.
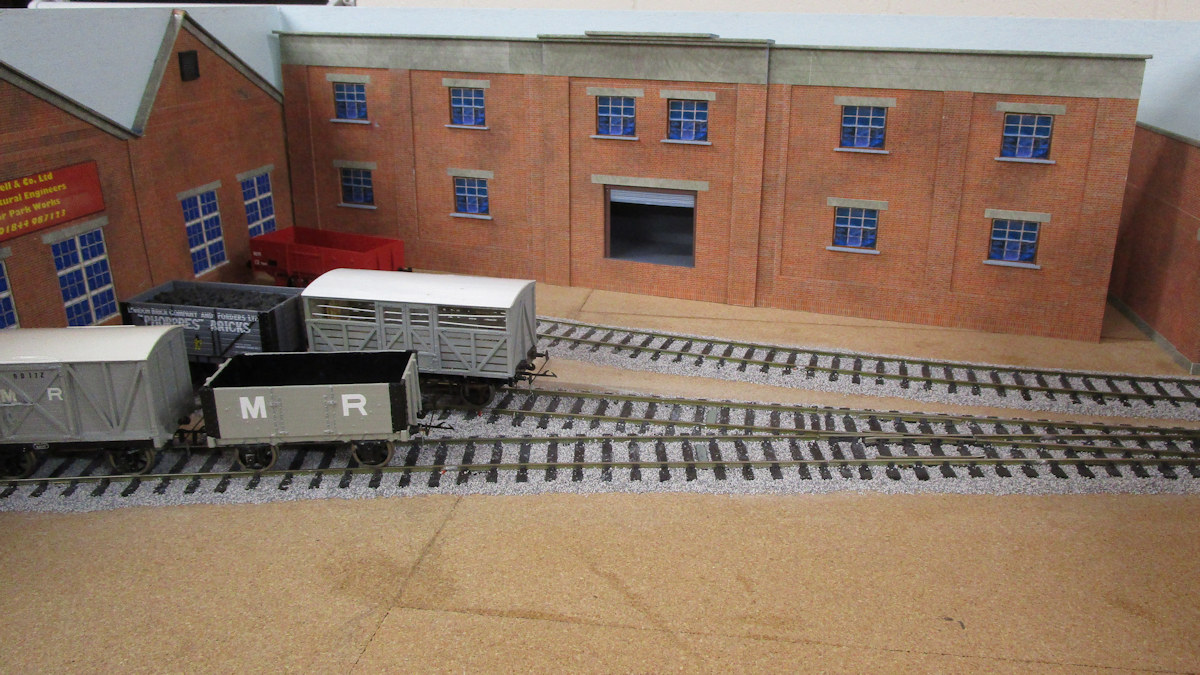
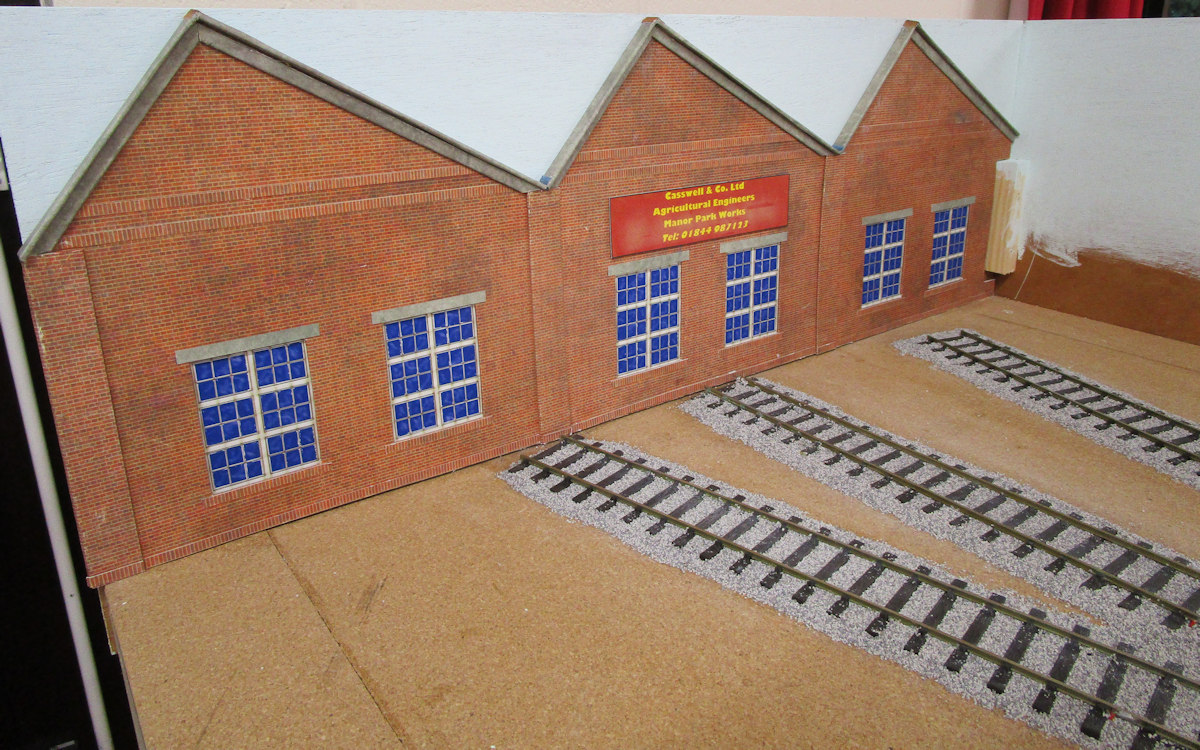
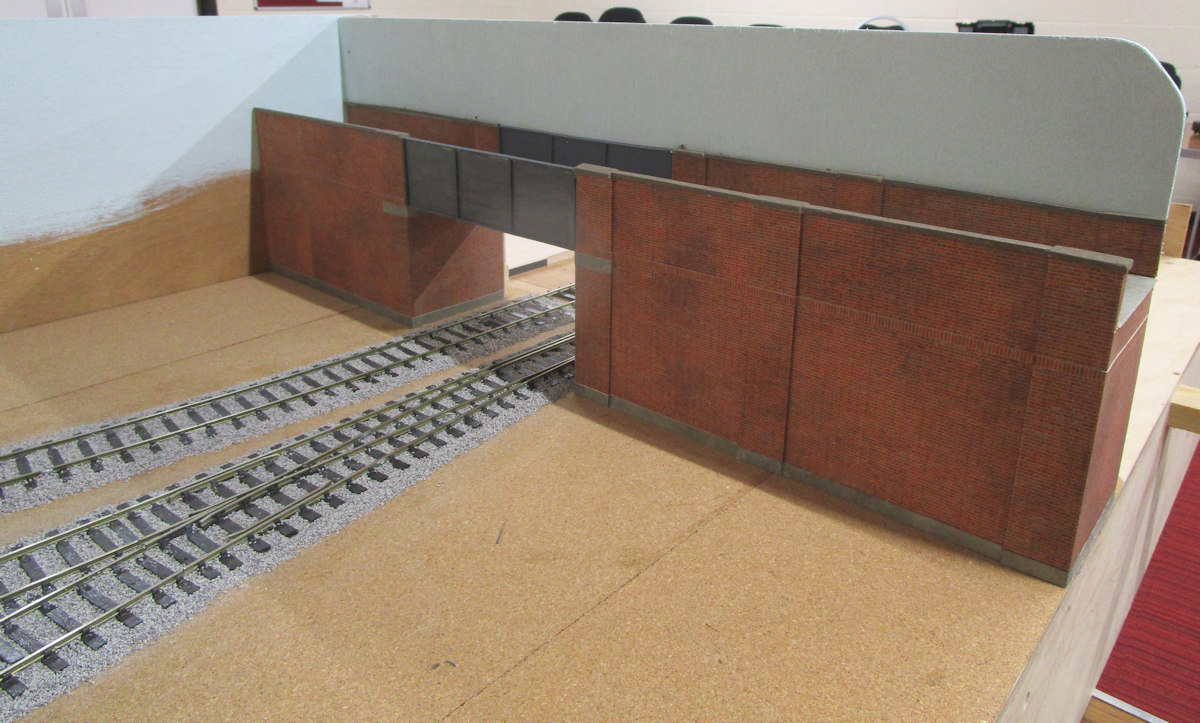
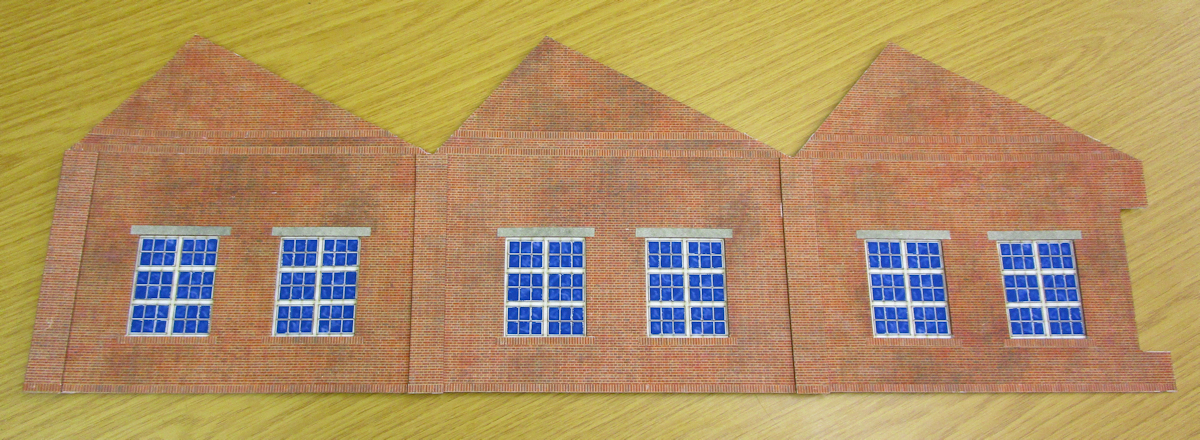
The first photo shows John C's completed first warehouse, he still needs build another one to go along the back. As can be seen from the second photo, he has nearly completed the bridge for the scenic break, the carcass of this is of 1.6mm artist's mount board, braced with the same, glued together with contact adhesive. The main surfaces are covered with O gauge red brick English bond brickpaper from a 'modelrailwayscenery.com' download (Ref TX198-O). The road surface and other 'concrete type' papers are from OO gauge 'Concrete Grime' papers from 'Scalescenes' (Ref TX32a). Bridge panels are simply bits of card painted a suitable colour. The wall coping is 3mm thick balsa, scribed and painted. There has been no serious effort made in the line of authenticity or historical/technical accuracy, they simply want to achieve a bit of atmosphere. He still has to build the second warehouse that goes along the back which he hopes to have in place for FestiRail in the 7th July.
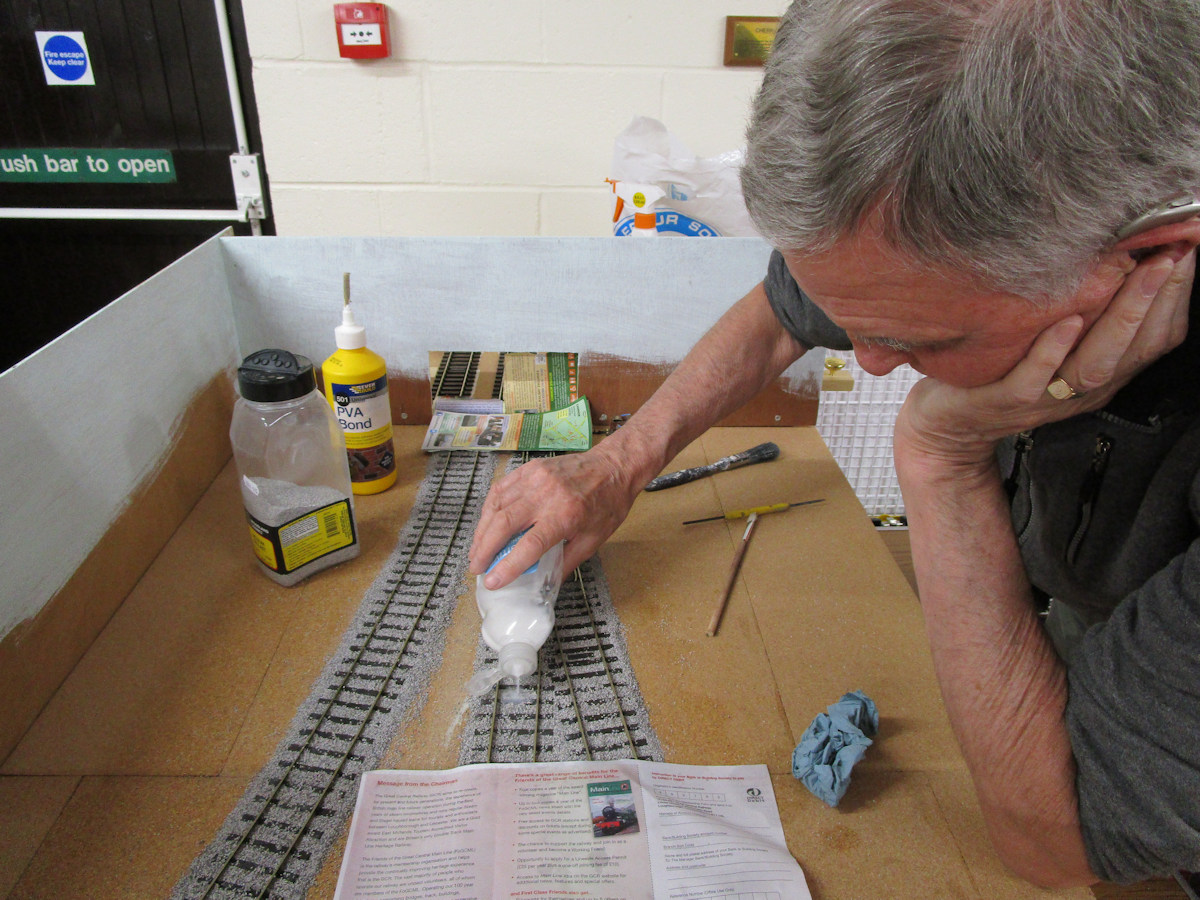
John H has laid down some Woodland Scenics ballast, then sprayed with water, and now as can be seen he is applying the diluted PVA glue.
John C has turned his attention to the low relief warehouses, these are made from plasticard covered with brick paper.
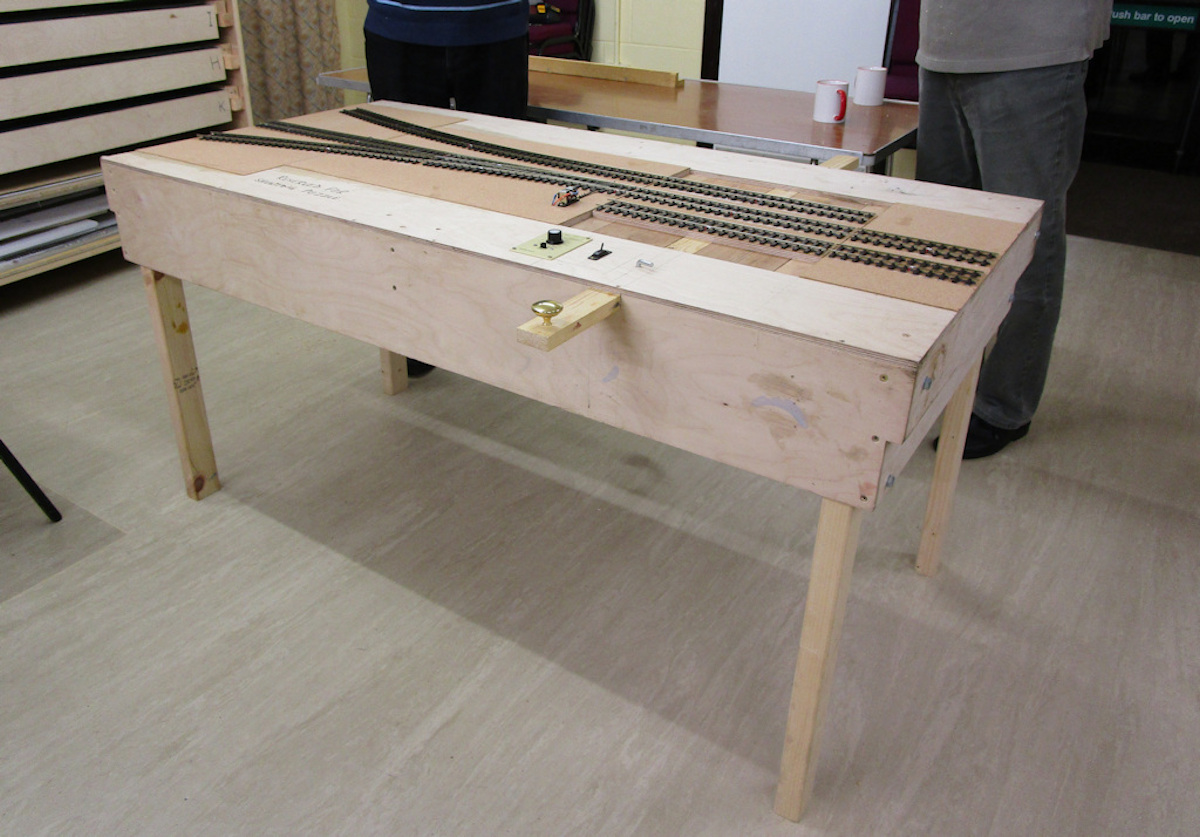
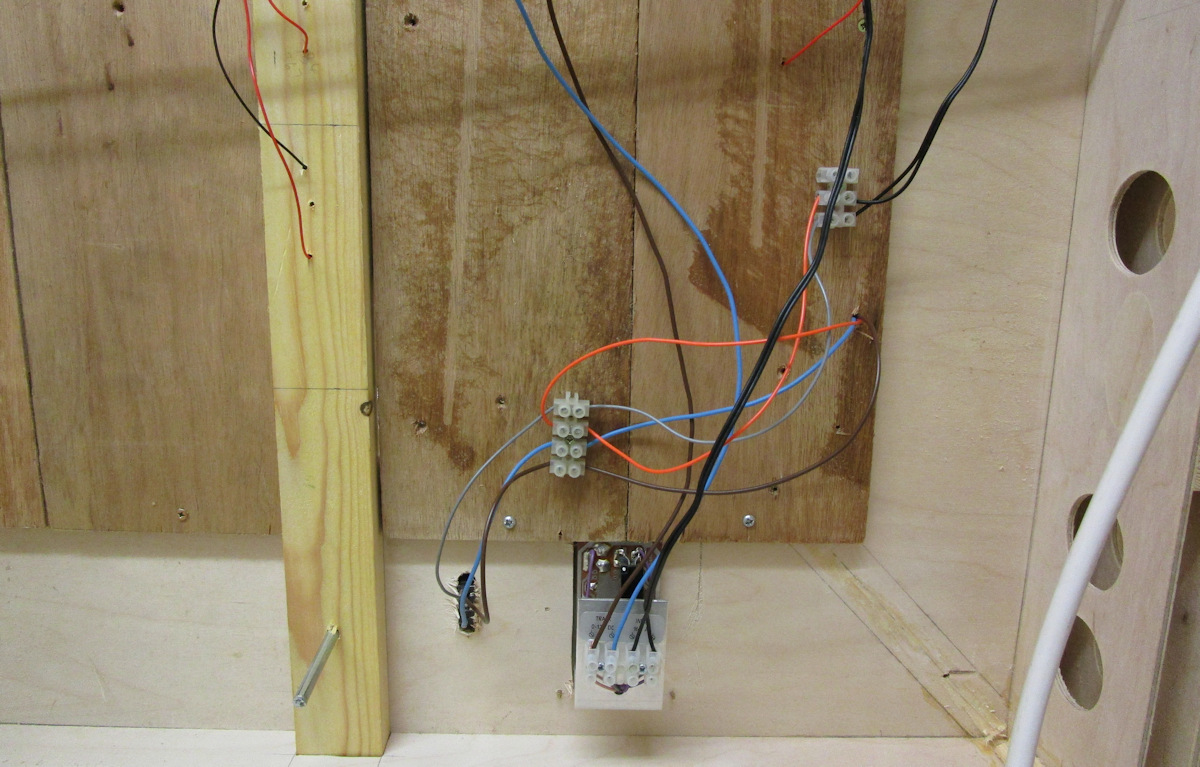
Wiring is now complete, and legs have been cut to size and fitted, this will allow a height for younger visitors to have a go, or for those of us who like to sit down to do the competition.
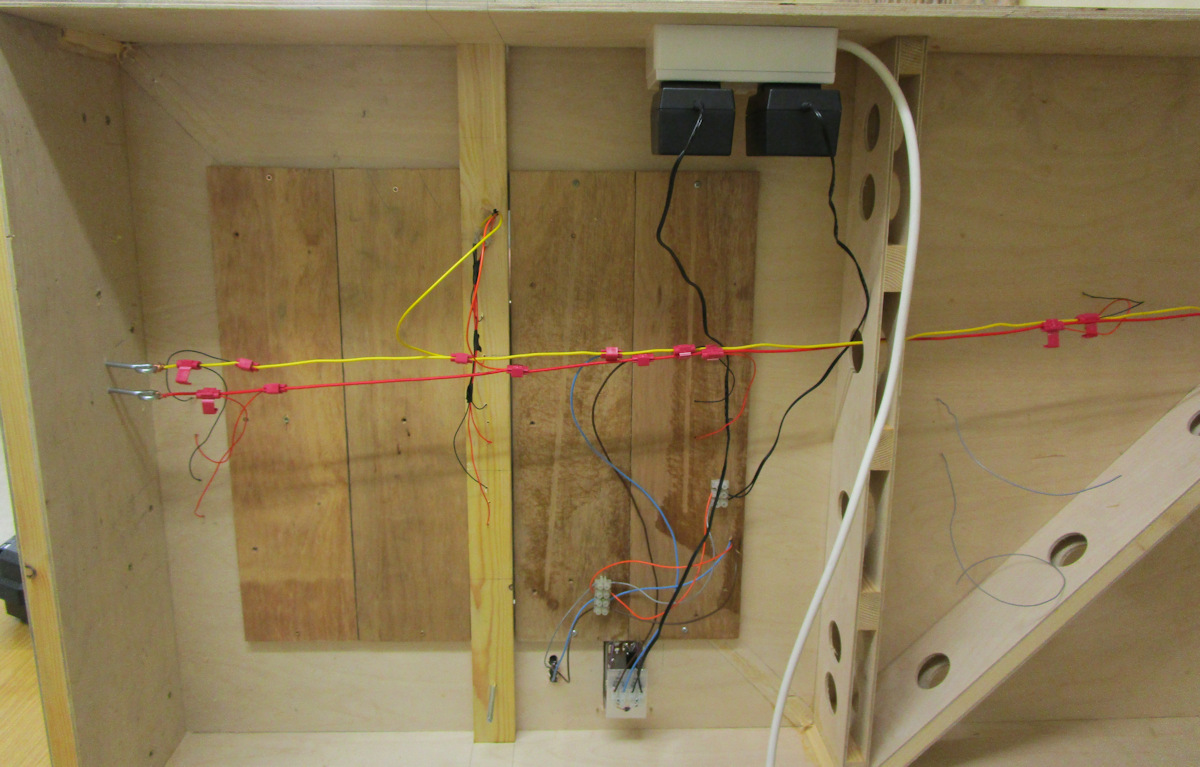
Wiring is nearly completed, just testing to go.
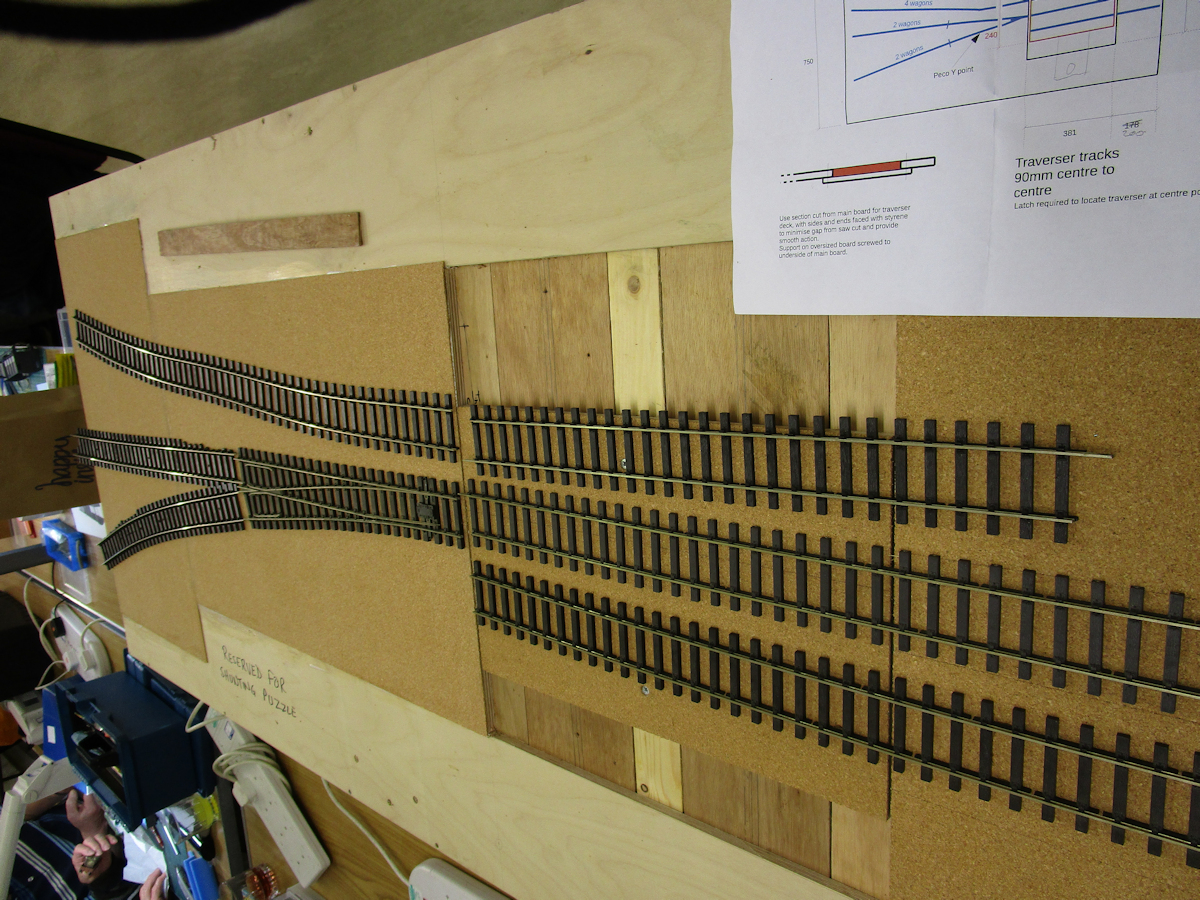
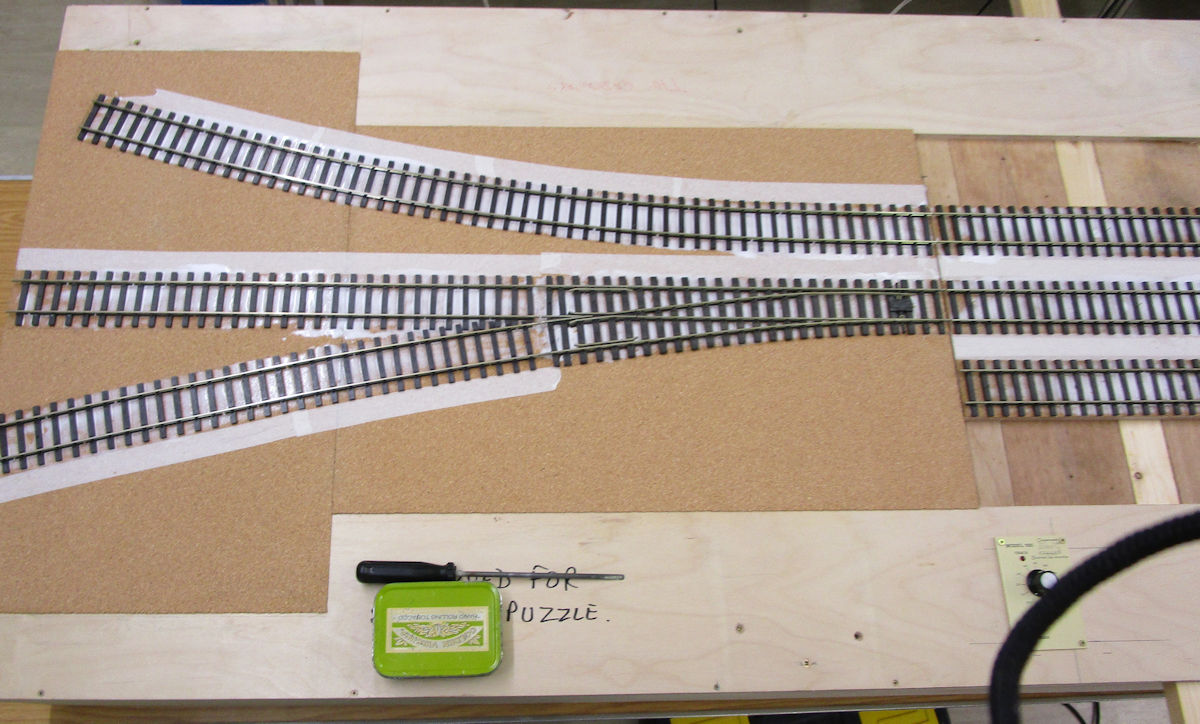
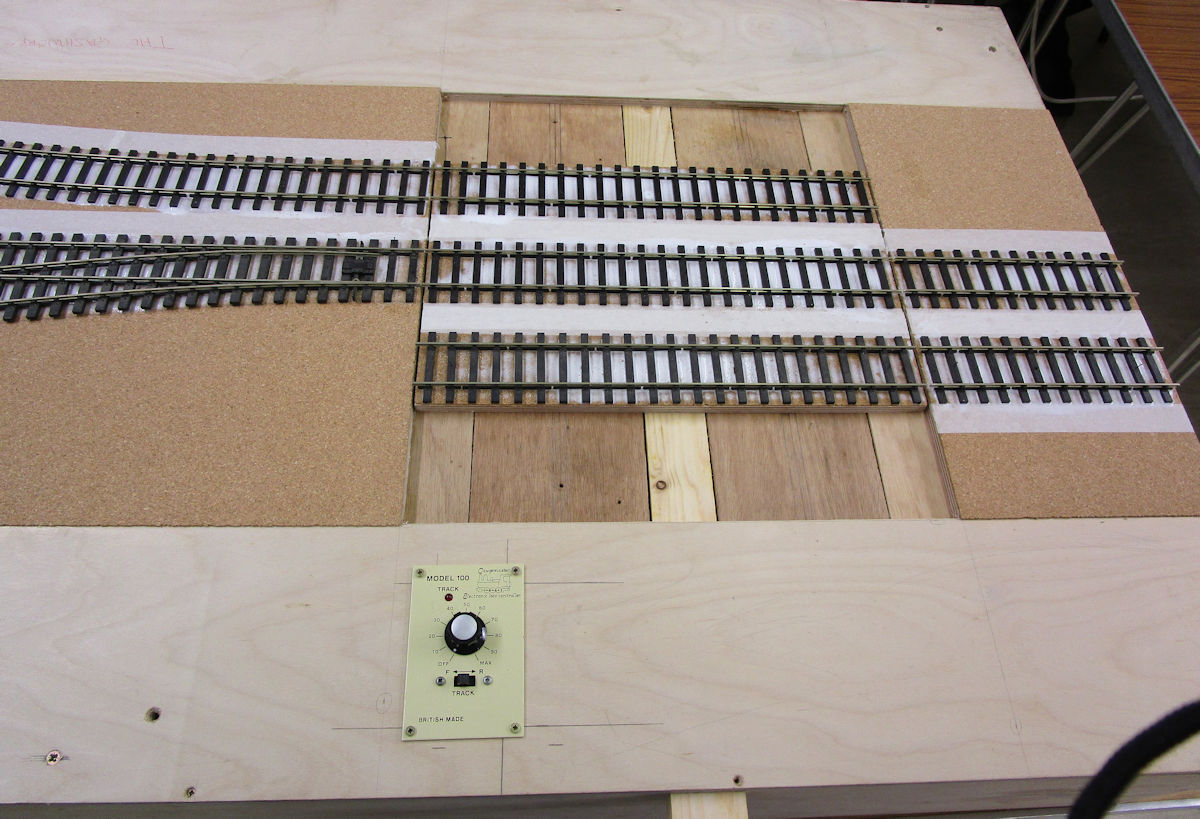
More progress, time has been taken to align and cut the track to size and then glued down on to the cork road bed with PVA, also it can be seen that a Gaugemaster panel mount controller has been fitted but not wired in yet.
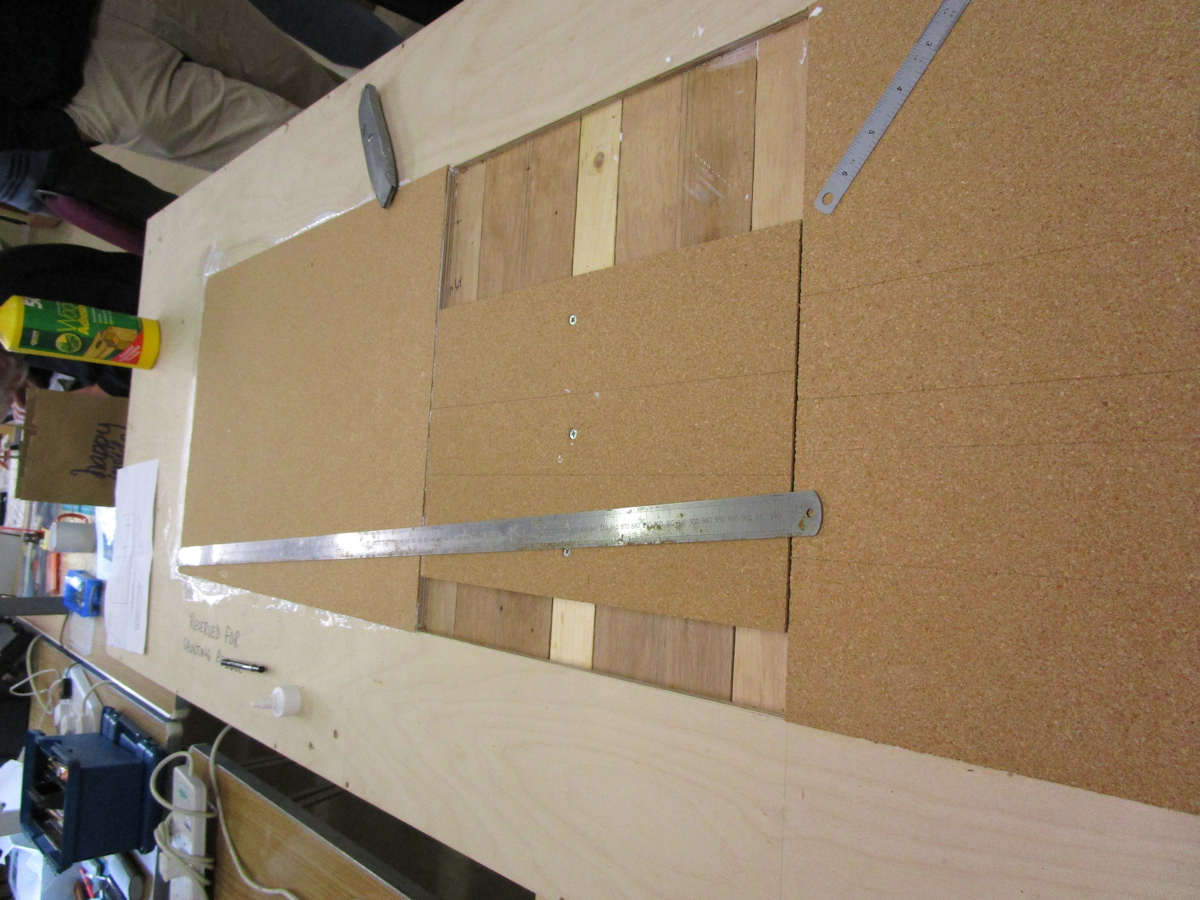
Progress has been made, the two John's have had the board cut for the traverser section, and then they have glued down the cork with PVA, during one of our Club nights in January.